In college we are producing a design board of our final garment design for the fashion show.
The design board shows our own style of illustration with detail and colour and presenting parts of our dress that we sample.
I will post my image up when I have finished my board.
Tuesday, 22 May 2012
Tuesday, 8 May 2012
College/ Work progress


The image above is a sketch I created inspired by Nadia Flower. I experimented with proportion and shading and I have another picture to post on my blog to show my progress.
Thursday, 3 May 2012
College/Bishop sleeve shirt
Hello lovlies!
I am posting about a shirt I have made in college. This shirt includes a yoke, cuffs, a collar and bishop sleeves. Firstly, here are my patterns and how I adapted them from the first draft.


I am posting about a shirt I have made in college. This shirt includes a yoke, cuffs, a collar and bishop sleeves. Firstly, here are my patterns and how I adapted them from the first draft.


1. This is my first draft which I traced around a basic shirt block marking notches. The block includes the front and back shirt piece, the sleeve and the cuff. it cannot be seen brilliantly as I traced lightly in pencil but you get my drift.
.
2. I then traced the back shirt piece without the yoke, the yoke on its own and then the front shirt piece and the cuff. These didn't need manipulated so I also added a 1.5cm seam allowance to all of these.


3. I then cut the pattern piece out after tracing around the new sleeve pattern and I slashed and spread the sleeve, the middle pieces I measured equally at 8cm. I then spread the other two pieces on the right by 8cm and 4cm on the other side. I then traced over the adapted pattern and had my final pattern piece for the bishop sleeve.
4. I then began to create a pocket pattern by placing my whole hand on a piece of paper and marking off the corners of my hand. I used dashed lined to mark and then used a ruler to create the straight pocket piece.
5. Lastly, I made the collar and the collar stand by measuring the neckline on my first draft to see how long the collar will be. I then wanted to my collar stand to be smaller and measured it at 4cm. I divided the collar into four sections and traced around the collar and the collar stand. I slashed and overlapped the collar stand then I slashed and spread the collar.then lastly I traced over and put a 1.5cm seam allowance.


I was then ready to manufacture!


 5.I then ironed on the interfacing to the collar and placed them right side to right side and sewed a 1.5cm seam allowance, then I cut the seam allowance in half to reduce bulk. I bagged out the collar and pressed it.


1. Firstly, I pinned my pattern pieces onto my fabric and then cut them out, I also cut out interfacing for my cuff, button stand, collar stand and collar.
2. I ironed on my interfacing to the button stand and folded it over and then top stitched in place close to the edge.


3. I added a small box pleat in the centre back piece following notches and secured with a tacking stitch. I then sandwiched this back shirt piece in between my back two yoke pieces and sewed them together with a 1.5cm SA.
PIC OF BACK YOKE.
PIC OF BACK YOKE.


4. To construct my pocket I placed the right sides together and stitched around leaving a small gap to bag out. I cut the seam allowance in half to reduce bulk and then bagged out the pocket. I then sewed the pocket onto the right front shirt piece making sure my stitch was very close to the edge.
I then stitched my front two pieces to the correct yoke positions with a 1.5 SA and overlocked.
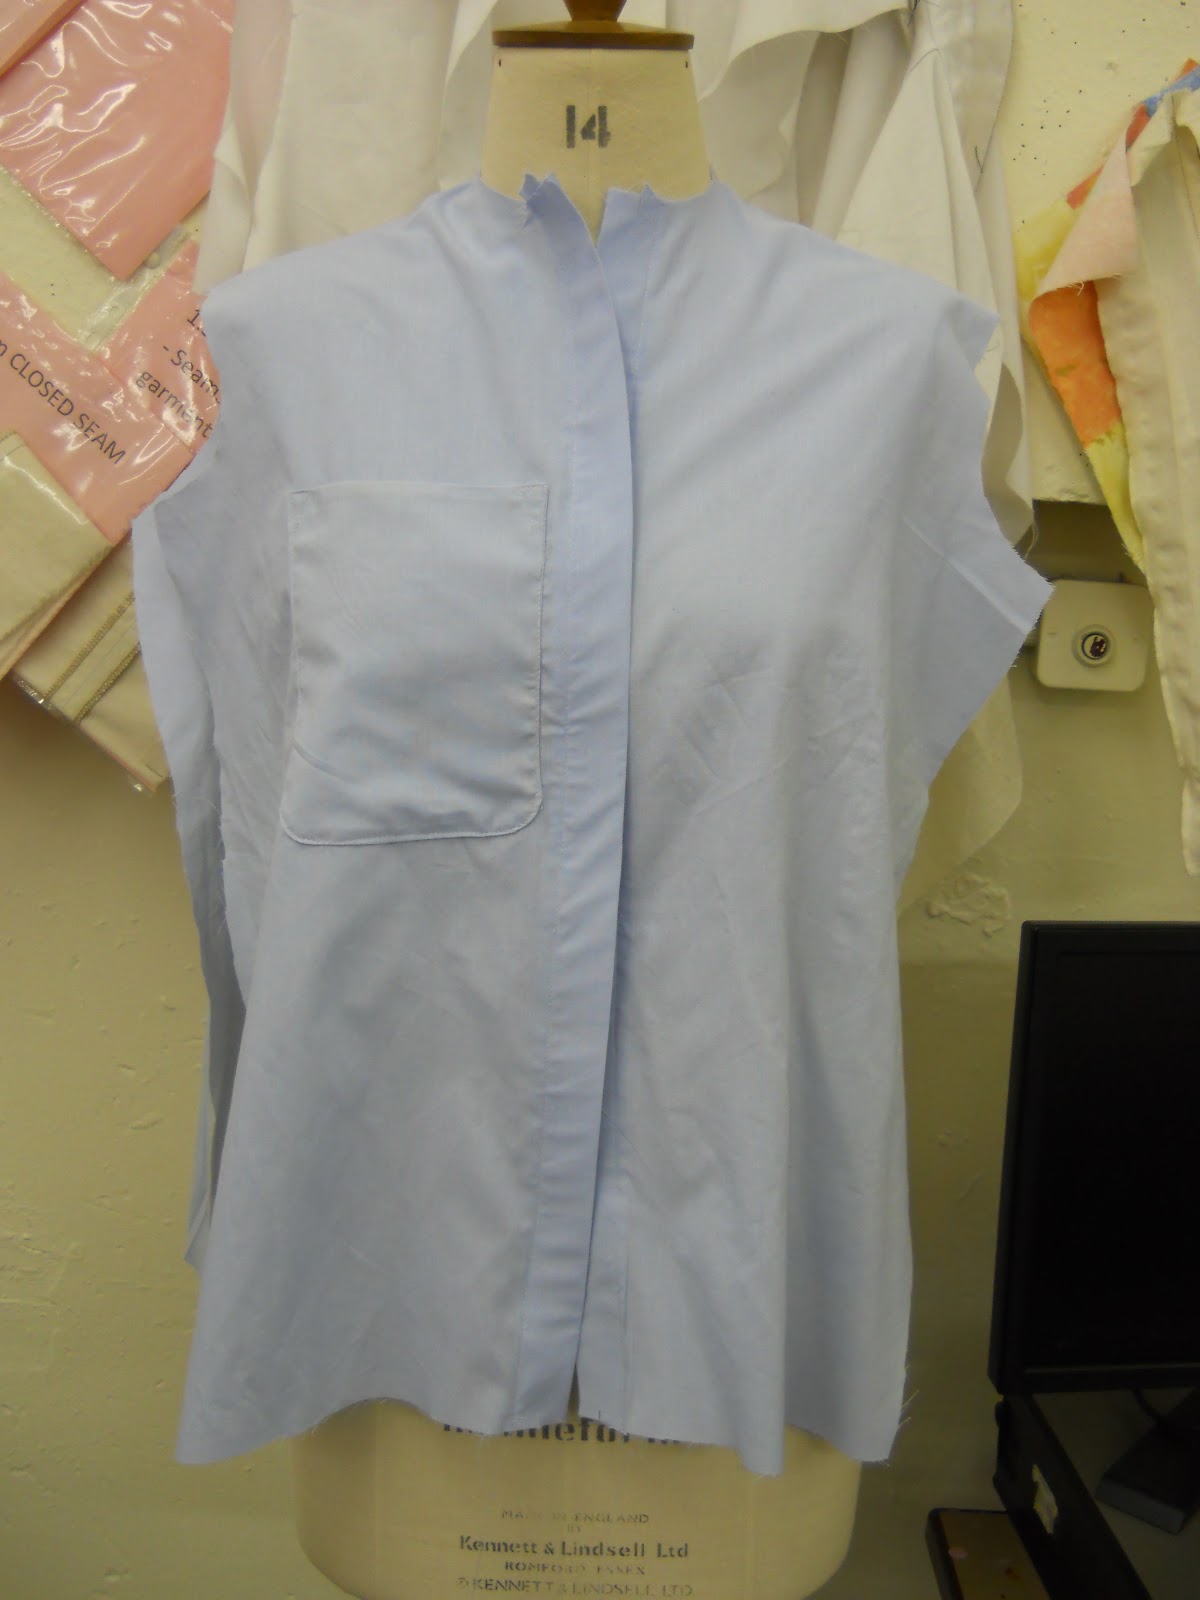
PIC OF FRONT AND BACK SHIRT TOGETHER.
PIC OF FRONT AND BACK SHIRT TOGETHER.


After I pressed the collar I sandwiched the collar between the two collar stands and stitched in place 1.5 seam allowance, I also cut notches to give the collar ease when sewing.
PIC OF COLLAR AND COLLAR STAND.
PIC OF COLLAR AND COLLAR STAND.

6.Then I started to attach the collar to the neck by sewing one side of the collar stand to the neck line. Then I folded over the other side of the collar stand and top stitched close to the edge to give a neat finish, I then ironed the collar and collar stand.
PIC OF COLLAR ON SHIRT.


7.Next I worked on the sleeve vent, First I sliced up the sleeve vent on both sleeves and then cut 2 strips of bias binding, I then attached the wrong side of the fabric to the bias binding with a 1cm seam allowance, I cut the seam allowance in half and ironed the bias strip over for a neat finish and top stitched.
8.I then sewed the sleeve head to the shirt by attaching them at the shoulder first and over locking the edges. I then closed the shirt up by sewing up the side seams which lead to the under arm seams. I overlocked together then pressed.
9. To construct the cuffs I took the top piece of the cuff and folded under 1.5cm and secured with topstitching. I then placed the two cuff pieces right sides together and sewed my seam allowance. I then reduced the bulk and bagged out.

10. To get the sleeve into the cuff I had to gather it to the same measurement of the cuff and inserted it into the cuff.

11.I sewed the long side of the cuff too the sleeve with 1.5cm seam allowance and then I pulled the top half over and tucked the raw edge inside the cuff.
12. After I tucked the untidy part in I top stitched the edge and then I unpicked the tacking stitch.
13. I then sewed on my buttons.
Tuesday, 1 May 2012
College/Portfolio work
OK, so the last few posts have been about college because college is the only time I can seem to post.
ANYWAY, the images of parts of my sketchbook and how I have developed my designs through research.


ANYWAY, the images of parts of my sketchbook and how I have developed my designs through research.


Subscribe to:
Comments (Atom)