The little life and ambition of a thrifty vintage foxx with a love of native culture, magick, yoga and bohemian grunge style...
Thursday, 19 July 2012
Waiting for the sun
This outfit is paying contribution to the crazy yet beautifully poetic Jim Morrison.
After watching the movie with the very gorgeous Val Kilmer, I began to understand the true concept of his songs and the weird yet meaningful lyrics he composes.
I have also ordered the biography: No one gets out here alive which I am ridiculously looking forward to reading. I love to read books about icons and especially music legends.
So this outfit consists of my sticky leather pants and a DIY cropped striped shirt which I got from H&M the men's department awhile ago.
I also purchased this tattoo choker awhile ago off eBay and I have wanted to show you all on my blog for months!
I absolutely love this choker and I remember when I was younger going to vintage tractor and car rallies and buying these for a hell of a lot cheaper! I used to get the matching bracelet and ring but unfortunately couldn't find these anywhere so I settled for just the choker.
Also the boots I am wearing cost me £5 but the sole came off today when I was dancing in the kitchen (my bad).
So I am back for good (unless my naughty laptop wants to play games with me again) and will be posting more outfits but I want to inject a few other posts involving make-up, music and if course a couple DIY's!
I have recently just become a Body Shop consultant which I am absolutely loving! As well as having my own vintage business, doing this alongside (which brings in alot more money!) the vintage I am learning about make-up, skincare and fragrances and being a lot more sociable by taking booking for Body Shop parties and organising them!
XIXRX
LOVE
Tuesday, 22 May 2012
College/My design board
In college we are producing a design board of our final garment design for the fashion show.
The design board shows our own style of illustration with detail and colour and presenting parts of our dress that we sample.
I will post my image up when I have finished my board.
The design board shows our own style of illustration with detail and colour and presenting parts of our dress that we sample.
I will post my image up when I have finished my board.
Tuesday, 8 May 2012
College/ Work progress
The image above is a sketch I created inspired by Nadia Flower. I experimented with proportion and shading and I have another picture to post on my blog to show my progress.
Thursday, 3 May 2012
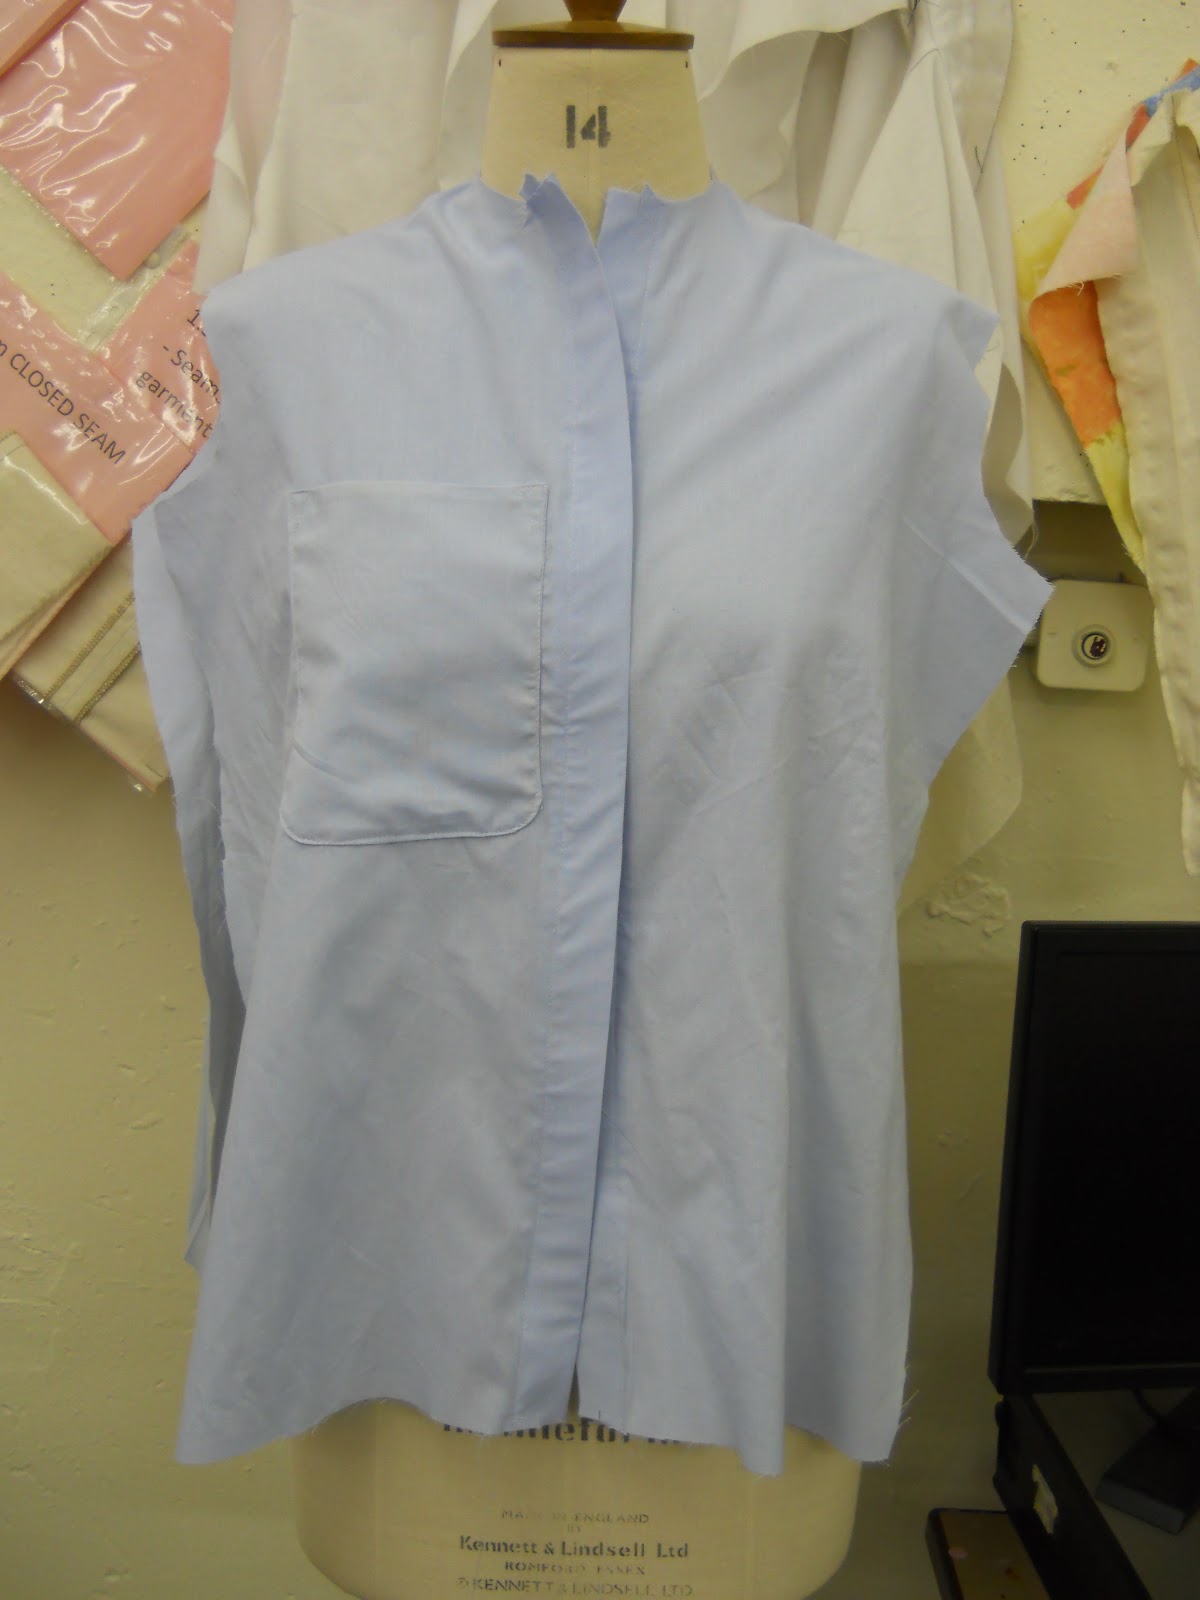
College/Bishop sleeve shirt
Hello lovlies!
I am posting about a shirt I have made in college. This shirt includes a yoke, cuffs, a collar and bishop sleeves. Firstly, here are my patterns and how I adapted them from the first draft.
1. This is my first draft which I traced around a basic shirt block marking notches. The block includes the front and back shirt piece, the sleeve and the cuff. it cannot be seen brilliantly as I traced lightly in pencil but you get my drift.
.
2. I then traced the back shirt piece without the yoke, the yoke on its own and then the front shirt piece and the cuff. These didn't need manipulated so I also added a 1.5cm seam allowance to all of these.
3. I then cut the pattern piece out after tracing around the new sleeve pattern and I slashed and spread the sleeve, the middle pieces I measured equally at 8cm. I then spread the other two pieces on the right by 8cm and 4cm on the other side. I then traced over the adapted pattern and had my final pattern piece for the bishop sleeve.
4. I then began to create a pocket pattern by placing my whole hand on a piece of paper and marking off the corners of my hand. I used dashed lined to mark and then used a ruler to create the straight pocket piece.
5. Lastly, I made the collar and the collar stand by measuring the neckline on my first draft to see how long the collar will be. I then wanted to my collar stand to be smaller and measured it at 4cm. I divided the collar into four sections and traced around the collar and the collar stand. I slashed and overlapped the collar stand then I slashed and spread the collar.then lastly I traced over and put a 1.5cm seam allowance.
I was then ready to manufacture!

1. Firstly, I pinned my pattern pieces onto my fabric and then cut them out, I also cut out interfacing for my cuff, button stand, collar stand and collar.
2. I ironed on my interfacing to the button stand and folded it over and then top stitched in place close to the edge.
3. I added a small box pleat in the centre back piece following notches and secured with a tacking stitch. I then sandwiched this back shirt piece in between my back two yoke pieces and sewed them together with a 1.5cm SA.
PIC OF BACK YOKE.
PIC OF BACK YOKE.
4. To construct my pocket I placed the right sides together and stitched around leaving a small gap to bag out. I cut the seam allowance in half to reduce bulk and then bagged out the pocket. I then sewed the pocket onto the right front shirt piece making sure my stitch was very close to the edge.
I then stitched my front two pieces to the correct yoke positions with a 1.5 SA and overlocked.
PIC OF FRONT AND BACK SHIRT TOGETHER.
5.I then ironed on the interfacing to the collar and placed them right side to right side and sewed a 1.5cm seam allowance, then I cut the seam allowance in half to reduce bulk. I bagged out the collar and pressed it.
After I pressed the collar I sandwiched the collar between the two collar stands and stitched in place 1.5 seam allowance, I also cut notches to give the collar ease when sewing.
PIC OF COLLAR AND COLLAR STAND.
6.Then I started to attach the collar to the neck by sewing one side of the collar stand to the neck line. Then I folded over the other side of the collar stand and top stitched close to the edge to give a neat finish, I then ironed the collar and collar stand.
7.Next I worked on the sleeve vent, First I sliced up the sleeve vent on both sleeves and then cut 2 strips of bias binding, I then attached the wrong side of the fabric to the bias binding with a 1cm seam allowance, I cut the seam allowance in half and ironed the bias strip over for a neat finish and top stitched.
8.I then sewed the sleeve head to the shirt by attaching them at the shoulder first and over locking the edges. I then closed the shirt up by sewing up the side seams which lead to the under arm seams. I overlocked together then pressed.
9. To construct the cuffs I took the top piece of the cuff and folded under 1.5cm and secured with topstitching. I then placed the two cuff pieces right sides together and sewed my seam allowance. I then reduced the bulk and bagged out.
10. To get the sleeve into the cuff I had to gather it to the same measurement of the cuff and inserted it into the cuff.
11.I sewed the long side of the cuff too the sleeve with 1.5cm seam allowance and then I pulled the top half over and tucked the raw edge inside the cuff.
12. After I tucked the untidy part in I top stitched the edge and then I unpicked the tacking stitch.
13. I then sewed on my buttons.
Tuesday, 1 May 2012
College/Portfolio work
OK, so the last few posts have been about college because college is the only time I can seem to post.
ANYWAY, the images of parts of my sketchbook and how I have developed my designs through research.
Sunday, 29 April 2012
Inspiration/Crafty stitches fair
Hello all!
I managed to nick a laptop to write up a blog on a craft fair I went yesterday. Tehe.
At college I am designing and trying to find inspiration for my final garment so I ventured to the fair and took a fair few photos of what I found wonderful and share them with you.
I managed to nick a laptop to write up a blog on a craft fair I went yesterday. Tehe.
At college I am designing and trying to find inspiration for my final garment so I ventured to the fair and took a fair few photos of what I found wonderful and share them with you.
Tuesday, 24 April 2012
College/Fashion Illustrators
I came across this illustrator recently, briefly heard of her work from such magazines like Vogue, and instantly fell for the eccentric British style the illustrations show.
Daisy De Villeneuve
Daisy De Villeneuve
London born illustrator, designer and writer Daisy de Villeneuve has an eccentric style with her funky felt-tip illustrations that has fascinated clients such as Topshop, Vogue, Nike and Random house. Similar to Gruau she uses minimal line and bold colours to achieve a signature individual look. The figures form a fresh, young and ironic British flair displaying the peculiar style with bold colours in the hair and clothing. Villeneuve’s work has inspired high street stores with collaborating with her artwork for packaging for a promotional and attracting look. The lines are not as precise with proportions as Gruau but have a messy tendency that shows originality.
What I find interesting about her work is that I similarly use this sense of style with the quirkiness and individuality. I like people to identify my work with the look of unusual and flamboyancy and I will try and use felt tips in my work for colour and detail.
Thursday, 19 April 2012
Hello old fellows!
Oh dear, I feel so seperated from the blogging world these past few weeks.
Having no laptop (as it has completely died on me) has cost me from posting DIY's and outfits and college...
ARGH.
I WILL get it sorted though!
For now, this is a quick post/rant about how SOON I will be back to my old ways with a few tricks up my sleeves with my blog.
I cannot describe how much I miss it and the only reason I can access it now is at college!
*manic cries of desperation for blogging*
Love you all!
Hanna-Lou
Having no laptop (as it has completely died on me) has cost me from posting DIY's and outfits and college...
ARGH.
I WILL get it sorted though!
For now, this is a quick post/rant about how SOON I will be back to my old ways with a few tricks up my sleeves with my blog.
I cannot describe how much I miss it and the only reason I can access it now is at college!
*manic cries of desperation for blogging*
Love you all!
Hanna-Lou
Tuesday, 17 April 2012
Easter=Work!
So the Easter holidays are over and it is back to reality of college...
I do enjoy college as I don't see it as a burden but more like a hobby, especially sketchbook work and researching designers.
Over the holidays I completed pages on my progress for the new brief which id building up to create my garment. I did a lot more research to inspire me for this garment as we don't do a collection until the second year.
What I decided to do was scrap the combintaion of cultures as I found that too many designers focus on this and I wanted to do something outside the box and bring something new to the table.
Before, I combined the mexican 'Day of the Dead' culture with the ancient Egyptains. I found it hard and it wasn't showing off the best of my ability so over 2 weeks I went back to my original Day of the Dead thread and found inspiration from burlesque pin-up girls, aesthetics, mirrors, arcitecture and lots more.
I will post images of my sketchbook to show how the flow of my work proceeds and links with the Day of the Dead.
I also researched into Fashion Designers and how they create a story/message/theme for their collection.
This furthur influenced me to create a deep meaning for my garment and to show this visually to my audience.
After reading about Alexander McQueen's 'Highland Rape' collection, I though how he expressed his colection was genuis. Dressing the models to look as if they had been raped by rips, blood splatters and messed hair created the image of a literal rape but in fact the story was focused on the 'rape' between Scotland and England and how they fought for their indepence.
I do enjoy college as I don't see it as a burden but more like a hobby, especially sketchbook work and researching designers.
Over the holidays I completed pages on my progress for the new brief which id building up to create my garment. I did a lot more research to inspire me for this garment as we don't do a collection until the second year.
What I decided to do was scrap the combintaion of cultures as I found that too many designers focus on this and I wanted to do something outside the box and bring something new to the table.
Before, I combined the mexican 'Day of the Dead' culture with the ancient Egyptains. I found it hard and it wasn't showing off the best of my ability so over 2 weeks I went back to my original Day of the Dead thread and found inspiration from burlesque pin-up girls, aesthetics, mirrors, arcitecture and lots more.
I will post images of my sketchbook to show how the flow of my work proceeds and links with the Day of the Dead.
I also researched into Fashion Designers and how they create a story/message/theme for their collection.
This furthur influenced me to create a deep meaning for my garment and to show this visually to my audience.
After reading about Alexander McQueen's 'Highland Rape' collection, I though how he expressed his colection was genuis. Dressing the models to look as if they had been raped by rips, blood splatters and messed hair created the image of a literal rape but in fact the story was focused on the 'rape' between Scotland and England and how they fought for their indepence.
Subscribe to:
Posts (Atom)

-010604.jpeg)